
To create a video with Claude skills, add a video skill such as Remotion's with npx remotion skills add, write your script first, prompt Claude Code scene by scene, then add a voiceover and music track and render with npx remotion render. Voice and music are separate steps, because the skill writes the visuals, not the sound. If you want a brief on a timeline with AI shots, voice and captions and no code, a browser tool like Vidwip AI Studio is the alternative.
Claude skills to create video work as a pipeline, not a single prompt: you write a script, a skill turns it into scene code, a renderer makes the picture, and you add the sound yourself. This guide walks the whole path from script to finished MP4, with extra space on voice and music, which most skill guides skip.
We read the official docs for each tool and link every command to its source, but we did not run this pipeline, so the worked example is a walkthrough, not a record of output. For Remotion install and render errors, see our guide to Claude Code motion graphics skills.
Claude skills to create video: the workflow at a glance
Six steps take you from an idea to a file. Each one is covered below.
- Script. Write what is said and what is on screen, scene by scene.
- Skill. Install a video skill so Claude Code knows the animation toolkit.
- Scenes. Prompt Claude Code one scene at a time and preview.
- Sound. Generate a voiceover and choose music.
- Mix. Place both tracks, lower the music under speech and add captions.
- Render. Export an MP4 and check it.
A skill is a folder with a SKILL.md file that Claude loads when your request matches its description. According to the Claude Code skills docs, personal skills live in ~/.claude/skills/<skill-name>/SKILL.md and project skills in .claude/skills/<skill-name>/SKILL.md.
Pick and install a skill
For making new video from code, Remotion’s agent skills are the best documented option we found. Remotion builds video from React components, and its skills page lists skills for creating projects, markup, captions and rendering.
Run one of these inside a Remotion project. They come from that page.
npx skills add remotion-dev/skills
gh skill install remotion-dev/skills
Remotion’s Claude Code guide also shows npx remotion skills add. Then run /skills in Claude Code to confirm the skill is listed, as the Claude Code docs describe.
If you are editing footage you already shot, a different skill fits better. Our ranked lists cover Claude skills for video creation and video editing skills for Claude.
Check the license before you ship
The Remotion license page says the free license is for individuals and companies of up to 3 people. Companies of 4 or more need a company license, so read it before client work.
Worked example: a 30-second explainer
This is an example we are walking through, not something we ran. Imagine a 30-second explainer called “What is a Kanban board”, with three scenes and one narrator.
Nothing below is output we observed. It lists what to check for.
Step 1: write the script first
Write the script before you open a terminal. A script with scene numbers gives Claude something concrete to build and gives the voiceover its words.
Scene 1 (0-8 s): Title "What is a Kanban board?" on a dark background.
  VO: "A Kanban board shows your work as cards on columns."
Scene 2 (8-20 s): Three columns, To do, Doing, Done. Cards slide across.
  VO: "Cards move left to right as work gets done."
Scene 3 (20-30 s): Closing line "Limit work in progress."
  VO: "Keep fewer cards in Doing, and work finishes faster."
Read the lines aloud and time them before you build anything.
Step 2: create the project
These commands come from Remotion’s Claude Code guide. Run the preview server in one terminal and Claude Code in another.
npx create-video --yes --blank my-video
cd my-video
npx remotion skills add
npm run devclaudeStep 3: prompt one scene at a time
Paste scene 1 and its timing. These prompts are our own wording, not from the docs.
- “Build scene 1 as an 8 second composition at 30 fps: the text ‘What is a Kanban board?’ fades in on a dark background.”
- “Build scene 2: three columns labelled To do, Doing and Done. Four cards slide from left to right over 12 seconds.”
- “Build scene 3: the line ‘Limit work in progress.’ holds for 10 seconds.”
Preview in Studio after each prompt. Remotion’s skills page suggests /remotion-docs for current API references and /remotion-best-practices if you are unsure which skill to use.
Keep the data in constants, such as card names, so you can edit it without another prompt.
Add a voiceover
A video skill writes the picture. It has no voice of its own, so you make the narration as a separate audio file.
Generate the voice file
One option is the ElevenLabs text-to-speech endpoint. Its API reference lists a POST to https://api.elevenlabs.io/v1/text-to-speech/{voice_id}, with your key in an xi-api-key header.
The same page shows this Python example. The default model_id is eleven_multilingual_v2, and the default output_format is mp3_44100_128.
import requests

url = "https://api.elevenlabs.io/v1/text-to-speech/JBFqnCBsd6RMkjVDRZzb"

querystring = {"output_format":"mp3_44100_128"}

payload = {
    "text": "The first move is what sets everything in motion.",
    "model_id": "eleven_multilingual_v2"
}
headers = {
    "xi-api-key": "xi-api-key",
    "Content-Type": "application/json"
}

response = requests.post(url, json=payload, headers=headers, params=querystring)

print(response.json())
Two changes are yours to make. Swap in your own key and script text, and save response.content to public/voice.mp3 instead of printing JSON, because the response is an audio file.
Ask Claude Code to write this as a small script that reads your script.txt. That makes the voice step repeatable.
Fit the scenes to the voice
Listen to the file and note its length. Then tell Claude: “The voiceover is N seconds long.
Resize each scene so its last word ends 0.3 seconds before the scene changes.”
Check this by ear in Studio. We have not verified that any skill does this automatically, so treat it as a manual pass.
Add music
Music is a second file. Use a track you have the right to use, or generate one, and save it as public/music.mp3.
If you generate music, read the license terms before publishing. Rules differ between tools, and we have not compared them here.
Place and mix the audio
Remotion documents audio with the <Html5Audio> component, and says <Audio> from @remotion/media is preferred for new audio work. This snippet comes from the Remotion audio docs.
import {Html5Audio, staticFile} from 'remotion';

export const MyVideo = () => {
  return (
    <>
      <Html5Audio src={staticFile('audio.mp3')} />
    </>
  );
};
The same page documents a static volume prop, such as volume={0.5}, and says volume can change over time using useCurrentFrame() and interpolate(). It also documents trimBefore and durationInFrames for cutting a track.
For this example, ask Claude: “Add voice.mp3 at full volume and music.mp3 at 0.2 volume. Fade the music in over the first 30 frames and loop it to the video length.”
Keep speech on top of music
Music at constant volume can bury a narrator. The simple fix is a low music volume, as above, and the better fix is to dip it only while the voice speaks.
Ask Claude to drive the music’s volume with interpolate() over the frames where the voice plays. The docs show that pattern for a fade, and you adapt it to the dip.
Mix outside Remotion if you prefer
FFmpeg can also mix two tracks. Its filter docs list amix with the options inputs, duration, dropout_transition, weights and normalize.
The docs’ own example mixes three inputs. We adapted it to two, so check it against the page.
ffmpeg -i voice.mp3 -i music.mp3 -filter_complex amix=inputs=2:duration=first:dropout_transition=3 mixed.mp3The filter docs also list sidechaincompress for ducking one track under another. We did not read its options, so look them up before using it.
Loudness
The same FFmpeg page documents the loudnorm filter, with targets I for integrated loudness, LRA for loudness range and TP for true peak. It gives defaults of -24.0, 7.0 and -2.0.
Pick your targets from the platform you publish on, not from us. We have not verified any platform’s required value.
Add captions
Remotion has a captions skill, /remotion-captions, which its skills page describes as guidance for captions and subtitles. Ask it to read your script.txt and show each line over its scene.
Because you wrote the script, you already have the words. That avoids transcription errors, though you still have to time each line to the voice.
Render and check the MP4
Render from the terminal with the syntax in Remotion’s render docs.
npx remotion render <composition-id> out/video.mp4The docs say that without --codec the H.264 encoder is used, and that the default --timeout is 30,000 ms. If a render stalls or times out, see the fixes in our Remotion error guide.
Then play the file start to finish. Check four things: the voice ends before the picture changes, the music never covers a word, captions match the speech, and the first and last frames are clean.
Keep it reusable: write your own skill
After one video, turn what worked into a skill. The Claude Code docs say to keep SKILL.md under 500 lines and put long reference material in supporting files.
A video skill of your own could hold your brand colors, fonts, scene timings, the ElevenLabs script and your loudness target. Next time you type its /skill-name and a new script.
Claude skills versus a no-code video tool
The skills route and a no-code route trade control for time. Here is a fair comparison.
| Claude skills + Remotion | Vidwip AI Studio | |
|---|---|---|
| Input | Script and prompts in a code project | Prompts and clips on a timeline, in the browser |
| Visuals | Code-built scenes you control per frame | AI shots from 16 video models, plus your own footage |
| Voice and music | You bring your own tools and files | Voices, music and sound effects made on the timeline (ElevenLabs) |
| Captions | Skill-guided, timed by you | Added in the editor |
| Reuse | Code and SKILL.md you can keep and version |
Projects save in your account |
| Cost | Claude plan, voice and music tools, free Remotion license for small teams | Credits, with a one-time 100 credit free grant; AI shots on paid plans |
| Export | Whatever you configure in Remotion | Up to 1080p at 30 fps |
Where the skills route wins
- Control. You decide every element and every frame, which no prompt-based timeline matches.
- Reusable code. A scene template or a
SKILL.mdcarries over to the next video. - No credit metering. Rendering on your machine does not spend Vidwip-style credits, though Claude and voice APIs still bill separately.
- Versioning. Your video is code, so git tracks every change and you can roll one back.
If you’d rather not touch a terminal
Vidwip AI Studio is a browser editor with video and audio tracks. You generate shots on 16 AI video models, add voices, music and sound effects, and export up to 1080p at 30 fps with no watermark.
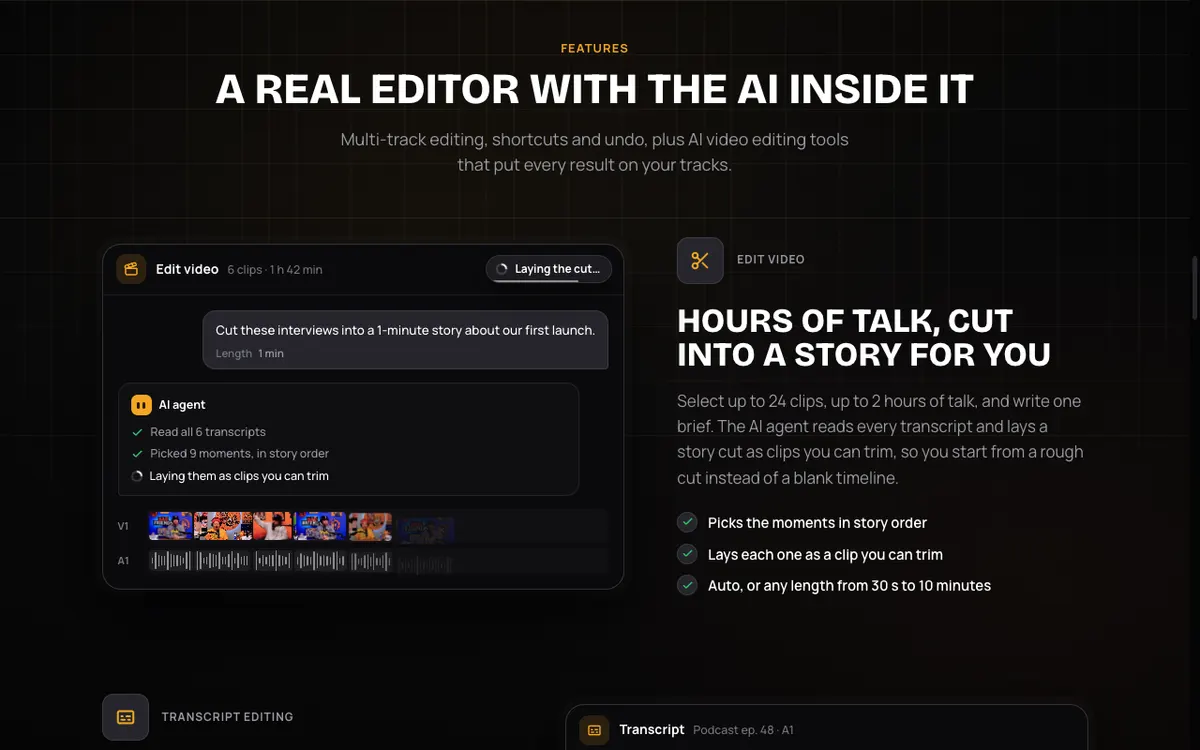
Vidwip has no Claude skill, MCP server or plugin, so this is a separate route and not an add-on. There is also no 4K export, and you cannot edit generated shots frame by frame like code.
Sound is metered. Per the credit rates on our pricing page, speech is 15 characters per credit and a song is 2 credits a second plus a 15 credit writer charge, with a 10 second minimum.
As arithmetic of our own, a 540-character narration costs 36 credits, and a 30 second song costs 75. Together that is 111 credits, just over the 100-credit free grant, before any shots, which need a paid plan and cost by the model.
The free grant is one-time, not monthly, and needs no credit card. For voice alone, see AI voiceover, and for a music track see the AI music generator.
Which route should you pick?
Pick the skills route if you want control, templates you will reuse and a video you can version in git. Pick a no-code tool if you want AI shots, voice and captions on one timeline without a project or a terminal.
The two also combine: you can use the skills route for a branded, repeatable explainer and a browser editor for other cuts.